Switching your domain name to a new registrar isn't as daunting as it might sound. The whole thing really boils down to three main phases: getting things ready with your current provider, kicking off the transfer with your new one, and finally, confirming the move is complete.
If you follow the steps correctly, the entire process takes about 5-7 business days, and the best part is, you won't have to worry about your website going down.
Why Transfer a Domain Name
Moving your domain is a pretty common task for anyone managing a website, but the reasons for doing it are usually strategic. This isn't just about swapping one company for another; it’s about fine-tuning your online setup for better costs, easier management, or just a better overall experience. Figuring out why you want to move is the first step in making a smart decision.
Most of the time, people decide to transfer a domain simply because they've found a better deal or they're looking for a platform that’s less of a headache to use. It’s a practical move to manage your digital life more efficiently.
Key Motivations for a Transfer
The reasons people start a domain transfer usually fit into one of these buckets:
- Better Pricing: It’s easy to get lured in by a cheap introductory offer, but the renewal prices can be a real shock. Shifting to a registrar with more reasonable long-term pricing is just a good financial decision.
- Consolidating Your Portfolio: Juggling domains across a handful of different registrars is a recipe for missed renewal dates and administrative chaos. Pulling them all under one roof gives you a single dashboard to manage everything, which simplifies renewals, security, and DNS settings immensely.
- Superior Customer Support: When your site has a problem, you need help, and you need it fast. If your current registrar leaves you on hold for an hour or gives unhelpful replies, moving to a company known for top-notch customer care can be a massive upgrade.
- Improved Management Tools: Let's be honest, a clunky, confusing interface can make simple tasks feel like a chore. Many people switch just to get access to a registrar with a cleaner, more intuitive dashboard for handling DNS records, security features, and account settings.
At its core, the decision to transfer your domain is about finding better value. Whether that value is measured in lower costs, slicker features, or just less stress, the goal is to find a home for your domain that actually works for you.
Ultimately, knowing how to transfer your domain puts you back in the driver's seat. It gives you the freedom to pick the best service for your online presence, not just the one you started with. You can find more tips and guides on this topic by exploring our other articles about domains. This whole process ensures your domain works for you, not the other way around.
Your Pre-Transfer Checklist
Before you even think about hitting that "transfer" button, there’s some crucial prep work to do. Think of it as a pre-flight check for your domain; getting these details sorted now will save you from a world of frustrating delays later on.
I’ve seen it countless times: a transfer fails simply because someone rushed through these initial steps. Taking a few minutes to get everything in order is well worth the effort.
First things first, log in to your current registrar's control panel. The absolute most critical task is to double-check that your registrant contact information is up to date, especially the administrator's email address. This isn't just for their records—every important verification and confirmation email for the transfer goes straight to that inbox. If you can't access it, the whole process grinds to a halt.
Unlocking Your Domain for Transfer
By default, your domain registrar puts a lock on your domain. It’s a great security feature that stops anyone from trying to transfer it away without your permission. But for a legitimate transfer, you’ll need to temporarily switch this off.
You'll usually find this setting in your domain management dashboard, often labelled "Domain Lock" or "Transfer Lock". It's typically a simple toggle or a button click to unlock it. If you're having trouble finding it, a quick search through your registrar’s help centre should get you there.
On a similar note, if you’re using a domain privacy service (sometimes called WHOIS privacy), that needs to be disabled for the transfer as well. This service works by hiding your personal details from public view, but your new registrar needs to see that info to confirm you're the rightful owner. Don't worry, you can easily flick it back on once the transfer is complete.
Understanding the 60-Day Transfer Lock
Here’s a rule you need to know about: the industry-wide 60-day transfer lock. ICANN, the organisation that governs domain names, has a rule that a domain can't be transferred to another registrar within 60 days of its initial registration or a previous transfer. If your domain is in that window, you’ll just have to be patient and wait until the 60 days are up.
Key Takeaway: The pre-transfer stage is all about verification and removing temporary roadblocks. Unlocking your domain, updating your contact email, and disabling privacy are the three non-negotiable steps to a smooth start.
Special Considerations for Australian Domains
For those with Australian domains like .com.au, the process has a few extra hoops to jump through. In Australia, the .com.au domain makes up about 74% of all registered domains, and transfers are tightly regulated to keep things trustworthy.
As of early 2025, the rules have been updated, now requiring that the domain name must exactly match a registered Australian trademark. You'll also need to make sure your Australian Business Number (ABN) is current and properly linked to your domain. It’s a good idea to familiarise yourself with the important updates to .au domain regulations to ensure you’re compliant.
Once you've ticked off everything on this checklist, you’re all set for a smooth transition. And if you're on the hunt for a great registrar to move to, be sure to check out our guide on how to find cheap domain registration deals online.
Alright, you’ve done the prep work and unlocked your domain. Now for the main event: kicking off the actual transfer. This is where you formally tell your new registrar, "I'm moving in," and hand over the keys.
The most critical piece of information you'll need right now is the EPP code, sometimes called an authorisation code or auth code. Think of it as the secret handshake for your domain. It’s a unique password that proves to the new registrar you have the authority to move the domain, stopping any unauthorised transfer attempts in their tracks.
Getting Your Hands on the Authorisation Code
First things first, you need to find this code. Log back into your current registrar's control panel. While every provider lays things out a bit differently, the EPP code is usually tucked away in the same area where you unlocked your domain.
- Start by looking for sections like "Domain Management" or "Security."
- Keep an eye out for a button or link that says something like "Get EPP Code," "View Auth Code," or "Transfer Out."
- For security reasons, some registrars will display the code right on the screen, while others will send it to the administrator's email address on file.
If you've clicked around for a few minutes and still can't spot it, don't pull your hair out. Just reach out to their support team. They're obligated to give it to you.
Once you have that code, it's time to switch over to your new registrar. You'll need to purchase their domain transfer service, which almost always includes a one-year extension of your domain's registration. During the checkout, they'll ask for the domain name you're moving and prompt you to enter the EPP code you just secured.
This infographic provides a great overview of the factors to consider when picking a new home for your domain.
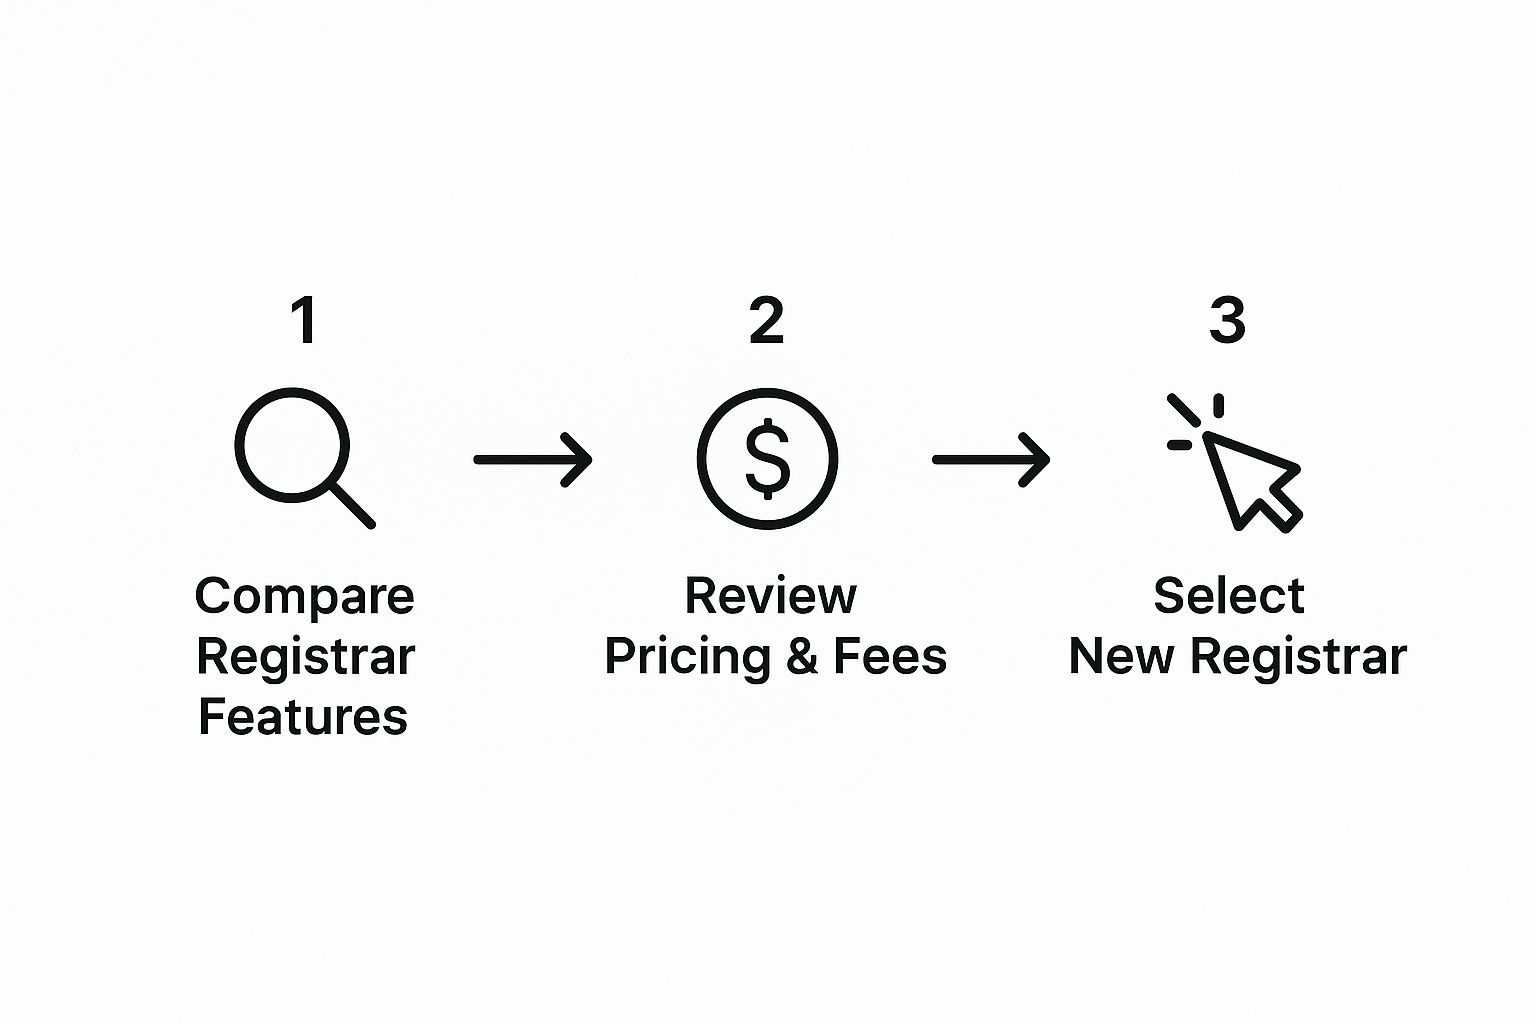
As you can see, choosing a new registrar is more than just a simple swap; it's a strategic move based on the features, support, and pricing that best fit your needs.
The Waiting Game: Verification and Confirmation
After you submit the transfer request with your EPP code, an automated process begins behind the scenes. Your new registrar sends a formal request to the central domain registry, which then pokes your old registrar to let them know what's happening.
This triggers a vital verification step. Your old registrar will send an email to the official administrator's contact address for the domain. This email is simply asking you to confirm that you really do want to transfer your domain away from them.
Pro Tip: Watch your inbox like a hawk for this email. Finding it and clicking the approval link as soon as it arrives can often shave a few days off the total transfer time. If you don't respond, the transfer will usually go through automatically after 5-7 days, but a quick confirmation can speed things along nicely.
It’s important to remember that during this entire waiting period, your domain’s nameservers stay pointed exactly where they are. This means your website, emails, and any other services will continue to run without a single hiccup. This is purely an administrative change happening in the background. If you're curious about the mechanics, our guide explaining how a DNS server works breaks it down nicely.
You can typically track the transfer's progress from your new registrar's dashboard, where its status will show as "Pending" or "In Progress." Once it’s all done, you’ll get a final confirmation email welcoming your domain to its new home.
To give you a clearer picture of what to expect, here’s a typical timeline for the domain transfer process.
Domain Transfer Timeline and Key Milestones
This table outlines the typical stages and expected duration for a standard domain transfer. Keep in mind that times can vary slightly between registrars, but this gives a solid baseline.
| Phase | Action Required | Estimated Time | Pro Tip |
|---|---|---|---|
| Preparation | Unlock domain, disable privacy, and get EPP code from current registrar. | 15-30 Minutes | Do this a week or two before your domain's expiry date to avoid any last-minute stress. |
| Initiation | Submit transfer request with EPP code at the new registrar. | 5-10 Minutes | Double-check that the admin email address for your domain is one you can access. |
| Verification | Wait for and approve the confirmation email from the old registrar. | 1 Hour to 2 Days | Check your spam folder! This email is crucial and can sometimes get filtered. |
| Registry Processing | The central registry and registrars communicate to finalise the transfer. | 3-7 Days | This is the main waiting period. Approving the verification email promptly can shorten it. |
| Completion | Receive confirmation from the new registrar. Domain is now managed by them. | Instant | Once complete, log in to your new registrar to check that all DNS settings have been carried over correctly. |
Following these phases helps demystify the process, turning what might seem like a complex technical task into a series of simple, manageable steps.
How to Prevent Website Downtime During a Transfer
The biggest fear with any domain transfer is that your website or emails will suddenly drop offline. It’s a valid concern, but the good news is that with a bit of forward planning, you can make the entire process completely seamless. A zero-downtime transfer is absolutely achievable.
It all boils down to understanding a little about how the Domain Name System (DNS) works and taking a few key steps before you even think about hitting that "transfer" button.
The Secret Weapon: Lowering Your TTL
Here’s a pro tip that makes a world of difference: lower your DNS records’ Time to Live (TTL) value. Think of TTL as an expiry date on your DNS information. It tells servers across the globe how long to "remember" your settings before they need to check for an update. A typical TTL can be 24 or even 48 hours.
About a day before you kick off the transfer, log into your current registrar's dashboard. Find your DNS settings and change the TTL for your most important records to a much shorter time, like 300 seconds (5 minutes). This one small tweak forces the internet to check for new information far more frequently. When your transfer completes, the world will see your new settings in minutes, not days.
Get Your New House Ready Before You Move In
The next trick is to set up everything at your new registrar before the domain even arrives. Most good registrars will let you configure the DNS for a domain that's on its way. You should absolutely take advantage of this.
- Copy Your Current Records: First, take a complete inventory of your existing DNS records at your old registrar. A screenshot or a quick list will do. Make sure you get your A record, any CNAMEs, your MX records (these handle your email), and anything else you have listed.
- Set Up the Records at Your New Registrar: Now, log in to your new registrar. Find the DNS management area for your incoming domain and meticulously add every single record from your list. You're essentially creating a perfect mirror of your current setup, ready and waiting.
- Run One Last Backup: This is just good practice. Before any major change, having a fresh backup of your website files and database is your ultimate safety net. If you need a refresher, our guide on effective website backup strategies to keep your site safe is a fantastic resource.
By pre-configuring everything, the moment your transfer is finalised, the DNS system already knows where to point visitors. The lowered TTL you set earlier ensures this new "address" is picked up almost instantly around the globe.
This proactive DNS management is the secret to a zero-downtime transfer. You're not waiting for something to break and then fixing it; you're ensuring there's no break in the first place.
This strategy is especially important in markets like Australia, where domain transfer policies can be quite strict. Stability is everything. Data shows that website owners value this consistency; the global renewal rate for major domains was around 75.5% in Q2 2025, showing a clear preference for sticking with what works. You can find more insights into domain industry trends on DNIB.com. Taking these small, proactive steps ensures your transfer is smooth and keeps your online presence solid and uninterrupted.
Finalizing Your Transfer and Post-Switch Checks
That confirmation email has finally landed in your inbox—your domain transfer is officially done! It’s tempting to just close the tab and get on with your day, but I always recommend running a few quick post-switch checks.
Think of it as the final walkthrough after moving into a new house. The heavy lifting is over, but you still need to flick the light switches and make sure the keys work. These last few steps are your insurance policy, making sure everything is running smoothly and your domain is secure in its new home. It only takes a few minutes but gives you complete peace of mind.
Verifying a Successful Transfer
First things first, let's confirm the transfer actually went through from a technical standpoint. The quickest way to do this is with a public WHOIS lookup. Just pop your domain name into a WHOIS tool, and the results should now list your new registrar as the official provider. If it does, you’ve got confirmation that the legal registration has moved over.
With that confirmed, it’s time to check that your website and email are still firing on all cylinders.
- Test Your Website: Open a fresh browser window and head to your website. Don't just look at the homepage; click around on a few different pages to ensure everything loads as it should.
- Check Your Email: Send a quick test email to an address on your domain, and then reply to it. This simple action confirms your MX records are pointing to the right place and that mail is flowing both ways without a hitch.
Running these simple tests verifies that your DNS settings have successfully propagated and are now active at the new registrar.
Your domain transfer is a small but important part of a massive global industry. In 2025, the Asia-Pacific region accounted for 21.9% of the global domain registrar market, a sector valued at over $2.7 billion USD. Australia plays a significant part in this, making these transfers a key component of our digital economy. You can explore more data about the growing domain registrar market on cognitivemarketresearch.com.
Final Housekeeping Tasks
Now that we know the core functions are working, there are just a couple of final housekeeping tasks to wrap things up neatly.
This is the perfect time to re-enable your domain privacy protection with your new registrar. Remember having to switch it off to start the transfer? Turning it back on is a crucial security step to shield your personal information from public WHOIS databases.
Similarly, if your website uses HTTPS (and it absolutely should), it’s always good practice to double-check your SSL certificate is working correctly after the move. If you run into any trouble, our guide on how to install an SSL certificate can walk you through the fixes.
Lastly, make a note of your new renewal date. A great perk of transferring a domain is that it almost always includes a one-year extension on your registration. Knowing this new date helps you budget for renewals and prevents any accidental, and potentially disastrous, expirations down the track. With these checks done, your domain is officially settled in and secure.
Common Questions About Domain Transfers

Even with a perfect guide, a few questions are bound to pop up when you're transferring a domain. It’s not something you do every day, so a little uncertainty is completely normal. We’ve put together this section to tackle the most common queries we hear from people just like you.
Think of this as your go-to FAQ for moving your domain. We'll clear up the timelines, put your fears about downtime to rest, and translate some of that technical jargon you'll bump into.
How Long Does a Domain Transfer Take?
The industry standard for a domain transfer is between five and seven days. This window isn't just arbitrary; it's a built-in security measure that gives both your old and new registrars time to communicate and process everything securely.
However, you can often nudge this along. Once the transfer kicks off, your old registrar will send you a verification email. If you jump on that and approve it straight away, you can sometimes slash the total time down to just a day or two. My advice? Always plan for the full week, especially if you're cutting it close to your expiry date, but keep an eye on your inbox for that crucial email.
Will My Website Go Down During the Transfer?
This is the number one concern for almost everyone, and the answer is a reassuring no—as long as you’ve done your prep work. Your website and email services should not experience any downtime at all.
The transfer of your domain's registration is a purely administrative process. It happens entirely behind the scenes and is completely separate from where your website is actually hosted. The key is to manage your DNS settings beforehand. As long as your nameservers are pointing to your host, the change in registrar will be totally invisible to your visitors.
The transfer process itself doesn't move your website files or your email accounts. It only changes which company is responsible for managing your domain's registration and renewal. Your hosting and email services remain untouched.
What Is an EPP Code?
An EPP code—sometimes called an authorisation code or auth code—is basically a unique password for your domain name. It’s a vital security feature designed to stop your domain from being transferred without your express permission.
Think of it as the keys to your digital property. You'll need to get this code from your current registrar and provide it to your new one. Without the correct EPP code, any transfer request is automatically rejected. It's the primary way you prove you're the legitimate owner with the authority to make the move.
Why Would a Domain Transfer Fail?
A transfer can get rejected for a handful of reasons, but thankfully, almost all of them are preventable with a bit of prep.
Here are the usual suspects:
- Incorrect EPP Code: This is the most common culprit. Even one wrong character will cause an instant failure.
- Domain Lock: If you forgot to unlock your domain at your current registrar, the transfer will be blocked right out of the gate.
- The 60-Day Lock: ICANN rules prevent a domain from being transferred within 60 days of a new registration or a previous transfer.
- Outdated Contact Info: If the verification email gets sent to an old, inaccessible email address, you won't be able to approve the transfer.
Running through the pre-transfer checklist we covered earlier is your best defence against these common roadblocks. A few minutes of preparation can genuinely save you days of troubleshooting.
Ready to make the switch to a simpler, more powerful platform? At Hosting Tap, we offer straightforward domain management, reliable hosting, and expert support all in one place. Transfer your domain to us today!


[…] Ultimately, you need flexibility. Make sure the registrar you choose has a straightforward policy for moving your domain if your needs change. For more on how that works, check out our guide on how to transfer a domain name. […]
Hey very nice web site!! Man .. Excellent .. Amazing .. I will bookmark your web site and take the feeds also…I am happy to find numerous useful info here in the post, we need work out more strategies in this regard, thanks for sharing. . . . . .
[…] You'll just need to connect it to your new Shopify store. In many cases, it makes sense to transfer your existing domain name over to Shopify to keep everything under one roof. It might sound technical, but Shopify's […]
[…] to frustrating connection errors. This is an issue we see all the time after someone decides to transfer their domain name to a new […]